Bb Major Guitar Chord | Play, Hear and Practice with Our Tool
Want a structured chord roadmap instead of jumping between pages?
Go to the full guitar chords tutorial.

The Bb maj chord is a fundamental member of the Major Chords family. It's built from the notes Bb, D, and F, corresponding to the essential music intervals of Root (1), Major Third (3), and Perfect Fifth (5). To truly master this chord, use the interactive fretboard tool at the top of this page. This powerful tool allows you to visualize every fingering, hear the chord played as a strum or arpeggio, and get instant feedback on your accuracy with the real-time microphone feature.
Understanding the construction of a major chord like Bb maj is key to unlocking the entire fretboard. If you're interested in diving deeper into how chords are built, explore our comprehensive guide on Chord Construction. Many common voicings of the Bb maj chord involve barre shapes; if you find these challenging, our Guitar Bar Chords tutorial offers invaluable tips. Practicing smooth transitions into and out of Bb maj will significantly enhance your playing, so don't miss our advice on how to Improve Chords Change.
As you scroll down this page, you'll find a wealth of resources: from 20 chord diagrams ranked by difficulty, exploring both open and movable shapes, to in-depth music theory explanations, practical examples of songs that feature the Bb maj chord, and the various musical keys where it commonly appears. Before you dive into the diagrams, we highly recommend spending a few minutes with the interactive tool above. Use its drum and BPM feature to set a practice tempo, strum the chord, and let the mic feedback guide your fingers. This active approach is the most effective way to integrate new chords into your muscle memory and playing.
Bb major guitar chord is also written as Bb, Bbmaj, BbM or BbΔ.
Notes of the Bb maj chord:
Chord Structure:
Bb Maj Guitar Chord Diagrams
Position 1 Movable

Finger Positions
- Mute the D string
- Mute the G string
- Mute the B string
- Mute the high E string
- Place your index finger (1) on the fret 5 of the A string
- Place your middle finger (2) on the fret 6 of the low E string
Position 2 Movable

Finger Positions
- Mute the low E string
- Mute the A string
- Mute the D string
- Mute the G string
- Place your index finger (1) on the fret 3 of the B string
- Place your pinky finger (4) on the fret 6 of the high E string
Position 3 Movable

Finger Positions
- Mute the low E string
- Mute the G string
- Mute the B string
- Mute the high E string
- Place your index finger (1) on the fret 5 of the A string
- Place your pinky finger (4) on the fret 8 of the D string
Position 4 Movable

Finger Positions
- Mute the low E string
- Mute the A string
- Mute the B string
- Mute the high E string
- Place your index finger (1) on the fret 7 of the G string
- Place your middle finger (2) on the fret 8 of the D string
Position 5 Barre Movable

Finger Positions
- Mute the low E string
- Mute the A string
- Mute the D string
- Mute the G string
- Place your index finger (1) on the fret 6 of the B and high E strings at the same time
Position 6 Open

Finger Positions
- Mute the low E string
- Mute the A string
- Let the D string play without pressing any fret
- Place your index finger (1) on the fret 1 of the high E string
- Place your ring finger (3) on the fret 3 of the G string
- Place your pinky finger (4) on the fret 3 of the B string
Position 7 Barre Movable

Finger Positions
- Mute the low E string
- Mute the A string
- Mute the high E string
- Place your index finger (1) on the fret 3 of the D, G and B strings at the same time
Position 8 Barre Movable
Finger Positions
- Mute the low E string
- Mute the high E string
- Place your index finger (1) on the fret 1 of the A string
- Place your ring finger (3) on the fret 3 of the D, G and B strings at the same time
Position 9 Barre Movable

Finger Positions
- Mute the low E string
- Mute the A string
- Place your index finger (1) on the fret 6 of the B and high E strings at the same time
- Place your middle finger (2) on the fret 7 of the G string
- Place your ring finger (3) on the fret 8 of the D string
Position 10 Barre Movable

Finger Positions
- Mute the low E string
- Mute the D string
- Place your index finger (1) on the fret 6 of the B and high E strings at the same time
- Place your middle finger (2) on the fret 7 of the G string
- Place your ring finger (3) on the fret 8 of the A string
Position 11 Barre Movable

Finger Positions
- Mute the low E string
- Mute the high E string
- Place your index finger (1) on the fret 3 of the D, G and B strings at the same time
- Place your ring finger (3) on the fret 5 of the A string
Position 12 Barre Movable

Finger Positions
- Mute the low E string
- Mute the A string
- Place your index finger (1) on the fret 3 of the D, G and B strings at the same time
- Place your pinky finger (4) on the fret 6 of the high E string
Position 13 Barre Movable

Finger Positions
- Mute the low E string
- Place your index finger (1) on the fret 10 of the G and high E strings at the same time
- Place your middle finger (2) on the fret 11 of the B string
- Place your ring finger (3) on the fret 12 of the D string
- Place your pinky finger (4) on the fret 13 of the A string
Position 14 Barre Movable

Finger Positions
- Mute the high E string
- Place your index finger (1) on the fret 3 of the D, G and B strings at the same time
- Place your ring finger (3) on the fret 5 of the A string
- Place your pinky finger (4) on the fret 6 of the low E string
Position 15 Barre Movable

Finger Positions
- Mute the low E string
- Place your index finger (1) on the fret 1 of the A and high E strings at the same time
- Place your ring finger (3) on the fret 3 of the D, G and B strings at the same time
Position 16 Barre Movable

Finger Positions
- Mute the low E string
- Place your index finger (1) on the fret 6 of the B and high E strings at the same time
- Place your middle finger (2) on the fret 7 of the G string
- Place your ring finger (3) on the fret 8 of the A string
- Place your pinky finger (4) on the fret 8 of the D string
Position 17 Barre Movable

Finger Positions
- Place your index finger (1) on the fret 6 of the low E, B and high E strings at the same time
- Place your middle finger (2) on the fret 7 of the G string
- Place your ring finger (3) on the fret 8 of the A string
- Place your pinky finger (4) on the fret 8 of the D string
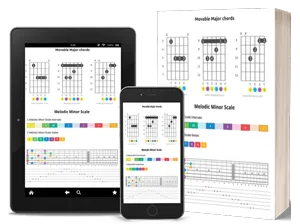
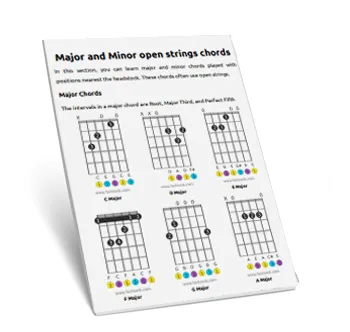
 Find more shapes in our all guitar chords online library. If you
prefer a printable pdf, download
the Free Guitar Chords Chart Pdf

Created by
Giancarlo is a musician (teaching guitar since 2000), software engineer, AI consultant and published researcher
FAQ
What notes comprise the Bb major chord?
The Bb major chord is built from three specific notes: Bb, D, and F. Bb serves as the root note, D is the major third above Bb, and F is the perfect fifth above Bb.
Why are the intervals 1, 3, and 5 significant for the Bb major chord?
The intervals 1 (Root), 3 (Major Third), and 5 (Perfect Fifth) are crucial because they define the specific sound and quality of any major chord, including the Bb major. These intervals tell us precisely which notes must be present to form the chord correctly.
What does it mean for the Bb major chord to be part of the 'Major Chords family'?
Being part of the 'Major Chords family' means the Bb major chord shares a fundamental interval structure with all other major chords. This structure always consists of a Root, a Major Third, and a Perfect Fifth, which gives major chords their characteristic bright and stable sound.