Practice the D7 Chord on Guitar with Real-Time Feedback
Want a structured chord roadmap instead of jumping between pages?
Go to the full guitar chords tutorial.
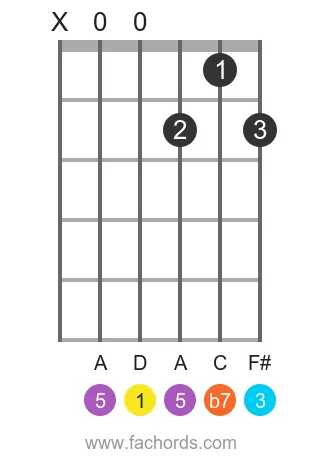
Struggling to nail the perfect D 7 chord? Our interactive fretboard provides instant, real-time mic feedback so you can verify your finger placement and strumming accuracy. You can also explore its sound with chord and arpeggio playback, all synchronized to a built-in metronome. This foundational member of the dominant chords family is built from the notes D, F#, A, and C, representing the 1 (root), 3 (major third), 5 (perfect fifth), and b7 (minor seventh) intervals.
Understanding the tension-and-release nature of dominant chords like the D 7 is crucial for blues and rock, providing harmonic drive and resolution. A solid grasp of dominant chord theory and chord construction, which reveals how intervals like the b7 contribute to its distinctive sound, will greatly enhance your playing. Knowing these fundamental elements is key to mastering not just the D 7, but also improving your overall command of the fretboard.
Before you dive into advanced theory, put your fingers to the test with our interactive tool. Below, you'll find comprehensive chord diagrams, arranged from easiest fingerings to more challenging voicings, alongside detailed theory and practical applications in songs across various keys. Start exploring the D 7 chord today!
Notes that compose the D 7 chord:
Chord Formula:
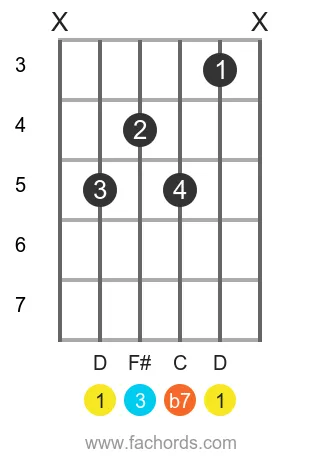
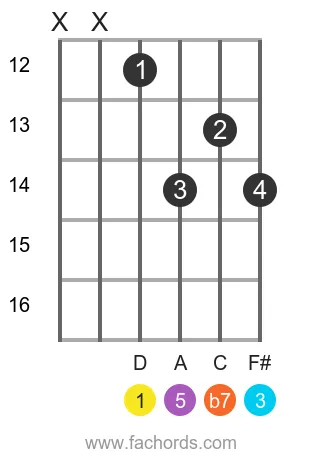
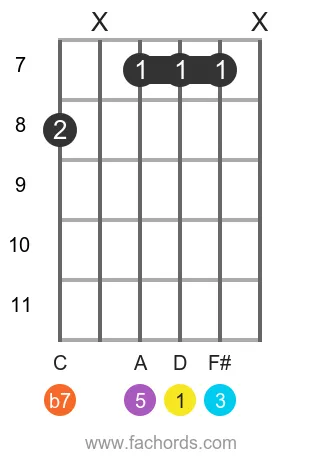
Fingerings for the D Dominant Seventh guitar chord
Position 1
Movable
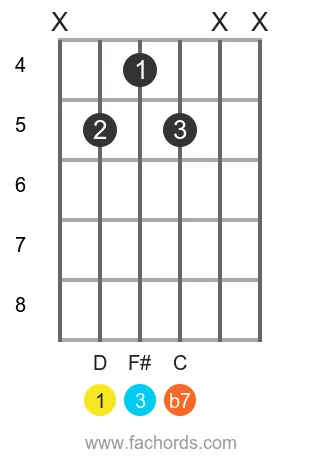
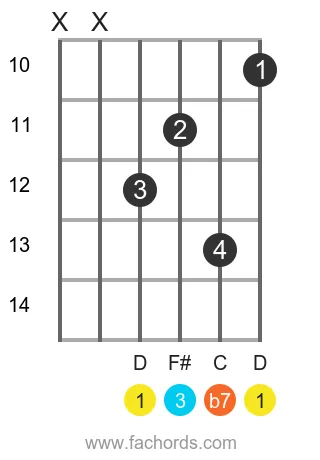
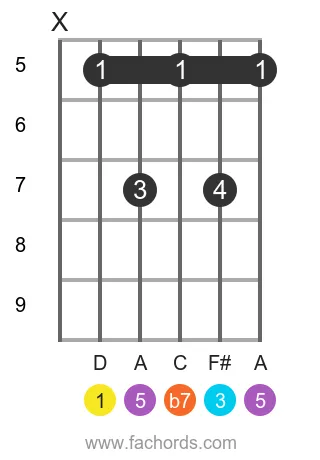
Position 2
Movable
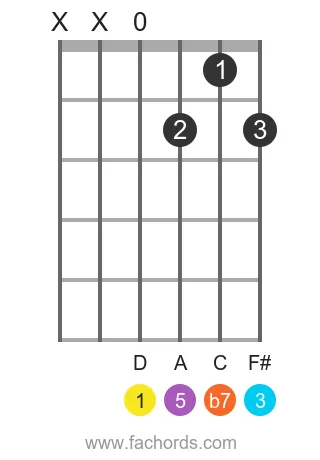
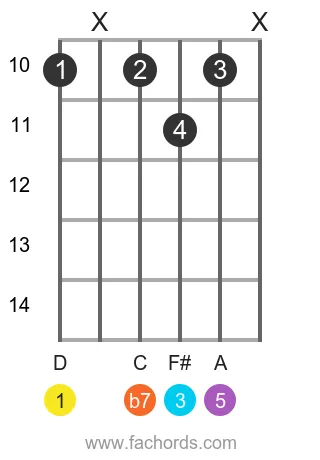
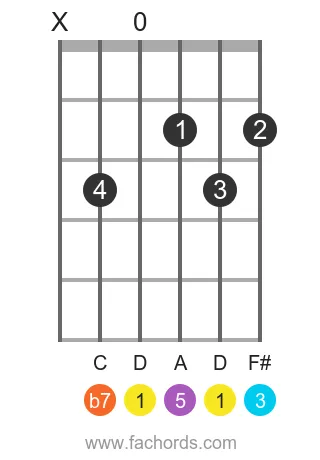
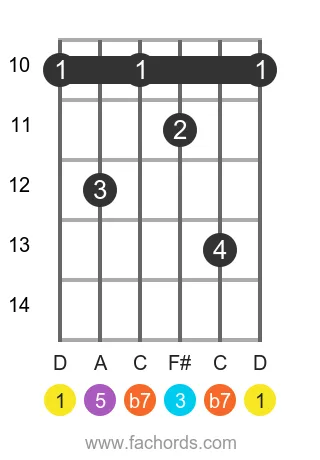
Position 3
Open
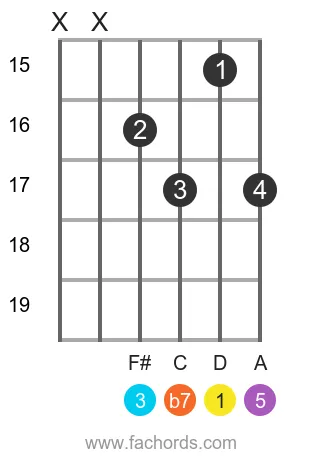
Position 4
Open
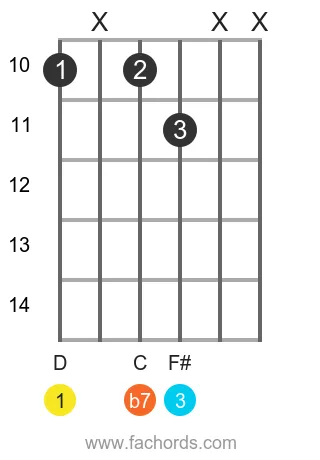
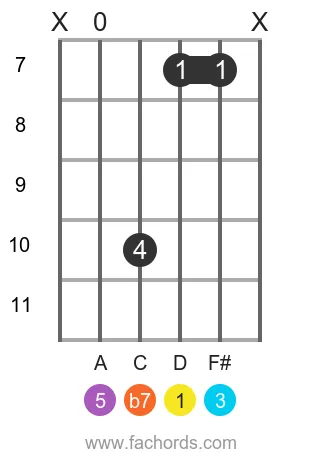
Position 5
Movable
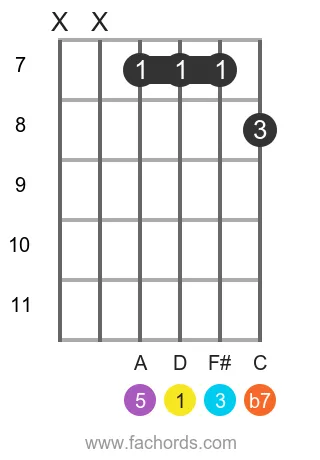
Position 6
Movable
Position 7
Movable

Position 8
Movable
Position 9
Movable
Position 10
Movable
Position 11
Open
Position 12
Barre
Open
Position 13
Barre
Movable
Position 14
Barre
Movable
Position 15
Barre
Movable
Position 16
Barre
Movable
 Find more shapes in our all guitar chords online library. If you
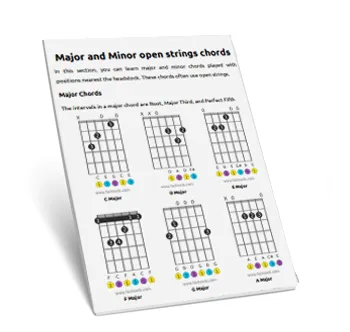
prefer a printable pdf, download
the Free Guitar Chords Chart Pdf
Find more shapes in our all guitar chords online library. If you
prefer a printable pdf, download
the Free Guitar Chords Chart Pdf
You can also use this accessible D7 chord page, with written diagram instructions and screen-reader support for blind users.
FAQ
What notes make up a D7 chord?
The D7 chord is constructed from the specific notes D, F#, A, and C. These four notes are combined to create its unique sound.
What musical intervals define the D7 chord?
The D7 chord is built using four distinct musical intervals relative to its root (D): the root itself (1), a major third (3), a perfect fifth (5), and a minor seventh (b7). These intervals are what give the chord its specific structure and sound.
Why is the D7 chord considered a 'dominant' chord?
The D7 chord is classified as a dominant chord because of its specific interval structure, particularly the presence of the minor seventh (b7) alongside the major third. This combination creates a characteristic harmonic tension that typically 'wants' to resolve, making it a fundamental element in many chord progressions.
What gives the D7 chord its distinctive sound?
The distinctive sound of the D7 chord comes from the combination of its major third (F#) and, most notably, its minor seventh (C). This particular blend of intervals creates a rich, often 'bluesy' or 'jazzy' tension that makes it easily recognizable and crucial in various musical styles.