Master G7b9 Guitar Chord: Fretboard Visuals & Real-time Play
Visualize and play the G 7(b9) guitar chord across the fretboard using our interactive tool, designed to help you discover its various movable shapes. Our virtual fretboard provides instant visual feedback, while real-time mic analysis verifies your accuracy as you play each position. This powerful Dominant Chord is built from a root (1), major third (3), perfect fifth (5), minor seventh (b7), and minor ninth (b9), giving you the notes G, B, D, F, and Ab.
As a member of the dominant chord family, the G 7(b9) chord brings a characteristic tension and resolution effect, making it a staple in genres like blues and jazz. For a deeper dive into the fundamental principles of constructing chords from intervals, explore our guide on Chord Construction. Understanding these building blocks is vital for truly mastering complex voicings like the G7(b9). Further enrich your understanding of how dominant chords function in music by checking out our dedicated resource on Dominant Chord theory. You can also explore how different voicings are created with our tutorial on Understanding Chord Inversions.
Below, you'll find a range of G 7(b9) guitar chord diagrams, organized from the easiest to the more challenging, allowing you to gradually expand your fretboard knowledge. Before you attempt to memorize every shape, we encourage you to first explore the chord's geometry and sound directly with our interactive tool. Apply your understanding in real musical contexts by incorporating this chord into songs and exploring its theoretical applications across different keys. Continually explore shapes before memorizing them to truly embed the G7b9 into your playing.
Notes that compose the G 7(b9) chord:
Formula of the Dominant Seventh Flat Nine Added chord:
G7(b9) Guitar Chord Voicings
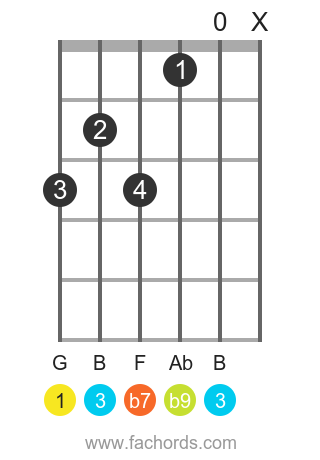
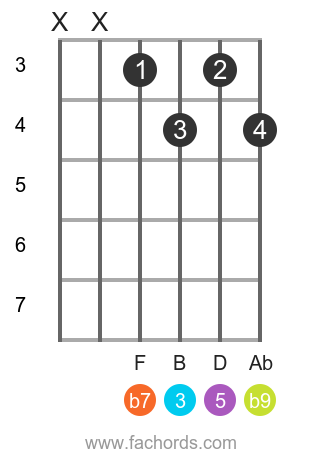
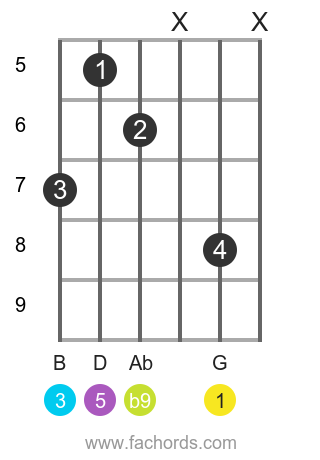
Position 1
Movable
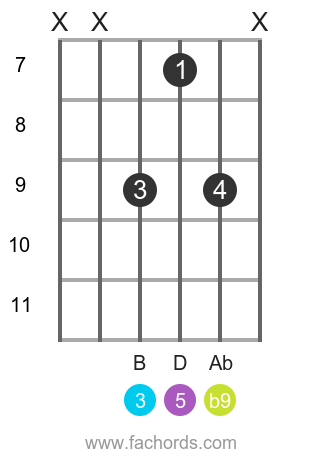
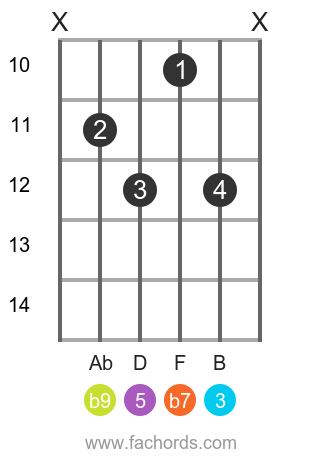
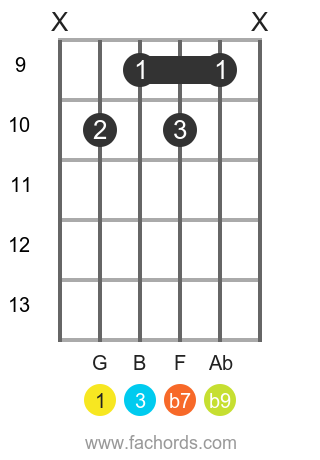
Position 2
Movable
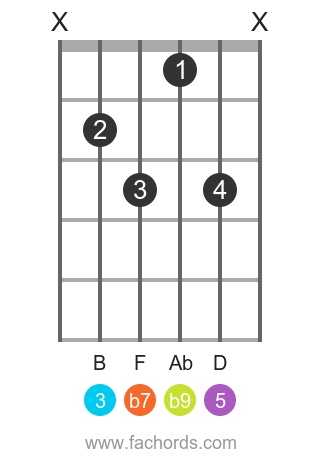
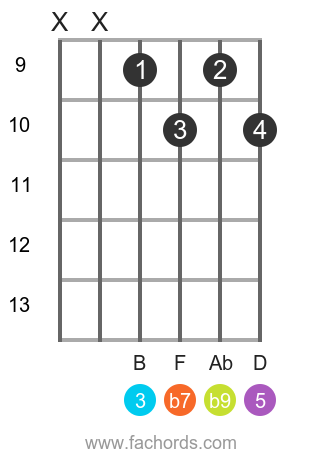
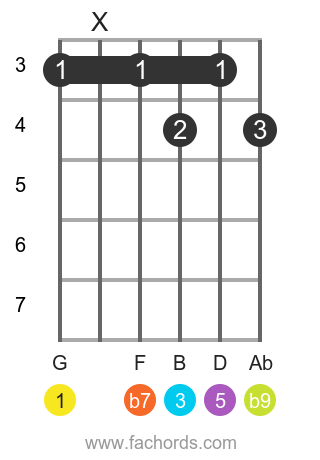
Position 3
Movable
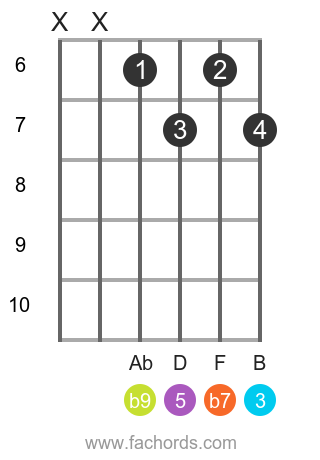
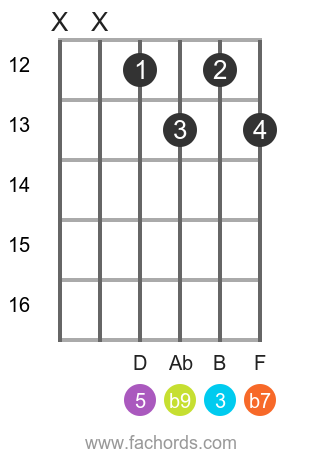
Position 4
Movable
Position 5
Movable
Position 6
Movable
Position 7
Movable
Position 8
Movable
Position 9
Open
Position 10
Barre
Movable
Position 11
Barre
Movable
 Find more shapes in our all guitar chords online library. If you
prefer a printable pdf, download
the Free Guitar Chords Chart Pdf
Find more shapes in our all guitar chords online library. If you
prefer a printable pdf, download
the Free Guitar Chords Chart Pdf
You can also use this accessible G7(b9) chord page, with written diagram instructions and screen-reader support for blind users.
FAQ
What are the specific notes and intervals that form the G7(b9) chord?
The G7(b9) chord is built from the root (1), major third (3), perfect fifth (5), minor seventh (b7), and minor ninth (b9). Specifically, for a G7(b9) chord, these intervals correspond to the notes G, B, D, F, and Ab.
Why is the G7(b9) considered a Dominant Chord, and what is its main musical characteristic?
The G7(b9) chord belongs to the Dominant Chords family because it inherently contains a strong sense of tension. Its main musical characteristic is this built-in tension, which typically creates a strong desire for resolution to another chord. This effect is commonly utilized in genres like blues and jazz.